Homemade Mayo with Avocado oil

Homemade Mayo with Avocado oil

The Ultimate Guide to Making Homemade Mayo with Avocado Oil: A Healthy and Delicious Alternative

Introduction to homemade mayo with avocado oil

Mayonnaise is a beloved condiment that adds creamy goodness to sandwiches, salads, and a variety of other dishes. While store-bought mayo is convenient, it often contains unhealthy ingredients like artificial preservatives and unhealthy oils. That’s where homemade mayo comes in. By making your own mayo, you have complete control over the ingredients, ensuring a healthier and tastier alternative. In this ultimate guide, I will show you how to make homemade mayo using avocado oil, a nutritious and flavorful option.

Benefits of using avocado oil in homemade mayo

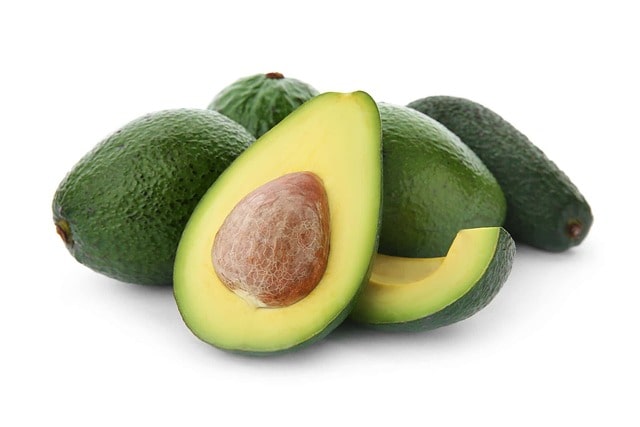
Avocado oil is a fantastic choice for making homemade mayo due to its numerous benefits. First and foremost, avocado oil is rich in heart-healthy monounsaturated fats, which can help reduce bad cholesterol levels and lower the risk of heart disease. Additionally, it contains vitamin E, an essential nutrient that acts as a powerful antioxidant, protecting your cells from damage. Avocado oil also has a high smoke point, making it suitable for high-heat cooking methods. This means that your homemade mayo can withstand higher temperatures without breaking down and losing its nutritional value.

The health benefits of homemade mayo compared to store-bought mayo

When you make your own mayo with avocado oil, you have the advantage of knowing exactly what goes into it. Unlike store-bought mayo, which often contains unhealthy oils like soybean or canola oil, homemade mayo allows you to use high-quality, nutritious ingredients. By using avocado oil, you are incorporating heart-healthy fats into your diet, which can have a positive impact on your overall health. Additionally, homemade mayo doesn’t contain any artificial preservatives or additives, ensuring a cleaner and more natural product.

Step-by-step guide to making homemade mayo with avocado oil

Making homemade mayo with avocado oil may seem intimidating, but it’s actually quite simple. Here’s a step-by-step guide to help you get started:

Step 1: Gather your ingredients To make homemade mayo with avocado oil, you will need the following:

  • 1 cup avocado oil
  • 1 egg yolk
  • 1 tablespoon lemon juice
  • 1 teaspoon Dijon mustard
  • Salt and pepper to taste

Step 2: Whisk the egg yolk In a medium-sized bowl, whisk the egg yolk until it becomes smooth and creamy.

Step 3: Slowly add the avocado oil While whisking the egg yolk continuously, slowly drizzle in the avocado oil. Make sure to pour it in a thin and steady stream to allow the mixture to emulsify properly.

Step 4: Incorporate the remaining ingredients Once the avocado oil is fully incorporated, add the lemon juice, Dijon mustard, salt, and pepper. Continue whisking until all the ingredients are well combined and the mayo has reached your desired consistency.

Step 5: Taste and adjust Give your homemade mayo a taste and adjust the seasonings as needed. You can add more lemon juice, mustard, or salt and pepper to suit your preferences.

Step 6: Store and refrigerate Transfer your homemade mayo to a clean jar or container with a tight-fitting lid. Refrigerate for at least 30 minutes before using to allow the flavors to meld together.

Tips and tricks for perfecting your homemade mayo

Making homemade mayo can be a bit tricky, but with these tips and tricks, you’ll be able to achieve perfect results every time:

Use room temperature ingredients: Make sure your egg yolk, lemon juice, and Dijon mustard are all at room temperature before starting. This will help with the emulsification process and ensure a smoother mayo.

Whisk continuously and slowly: When adding the avocado oil, whisk continuously and slowly to allow the oil to emulsify properly. Pouring it too quickly can cause the mixture to separate.

Experiment with flavors: Homemade mayo is incredibly versatile, so don’t be afraid to experiment with different flavors. Add minced garlic, fresh herbs, or spices to create unique and delicious variations.

Add a touch of sweetness: If you prefer a slightly sweeter mayo, add a teaspoon of honey or maple syrup to the mixture. This will give your mayo a subtle sweetness without overpowering the other flavors.

Use an immersion blender for foolproof mayo: If whisking by hand proves to be too challenging, you can use an immersion blender for foolproof mayo. Simply place all the ingredients in a tall container, insert the blender, and blend until smooth and creamy.

Variations and flavor additions for your avocado oil mayo

Once you’ve mastered the basic homemade mayo recipe, it’s time to get creative with variations and flavor additions. Here are a few ideas to inspire you:

Chipotle mayo: Add a teaspoon of chipotle powder or adobo sauce for a smoky and spicy kick.

Garlic and herb mayo: Mix in minced garlic, fresh herbs like dill or parsley, and a squeeze of lemon juice for a refreshing and flavorful mayo.

Sriracha mayo: Stir in a tablespoon of sriracha sauce for a mayo with a tangy and spicy twist.

Curry mayo: Add a teaspoon of curry powder and a pinch of turmeric for a mayo with an exotic and aromatic flavor.

Basil pesto mayo: Blend fresh basil leaves, pine nuts, Parmesan cheese, and garlic in a food processor. Stir the pesto into your homemade mayo for a burst of herbaceous goodness.

Storing and preserving homemade mayo with avocado oil

To ensure the longevity of your homemade mayo, it’s essential to store and preserve it correctly. Here are some guidelines to follow:

Refrigerate promptly: Homemade mayo should be refrigerated immediately after making it. This will help prevent the growth of harmful bacteria.

Keep it tightly sealed: Transfer your homemade mayo to a clean jar or container with a tight-fitting lid. This will prevent any air from entering and help maintain freshness.

Use within one week: Homemade mayo typically has a shelf life of about one week in the refrigerator. Be sure to check for any signs of spoilage, such as an off smell or mold, before using it.

Avoid cross-contamination: Always use clean utensils when scooping out your homemade mayo to avoid cross-contamination. This will help prevent any bacteria from entering the jar and prolong its shelf life.

Recipes and ideas for using homemade avocado oil mayo

Now that you have a jar of homemade avocado oil mayo, it’s time to put it to good use. Here are some recipes and ideas to inspire you:

Classic chicken salad: Toss shredded chicken with celery, red onion, and a generous dollop of homemade avocado oil mayo for a classic and satisfying chicken salad.

BLT with a twist: Spread a generous amount of homemade avocado oil mayo on toasted bread, then layer crisp bacon, fresh lettuce, and juicy tomatoes for a delicious twist on the classic BLT.

Creamy coleslaw: Mix shredded cabbage, carrots, and sliced bell peppers with homemade avocado oil mayo for a creamy and flavorful coleslaw.

Baked salmon with mayo crust: Spread a layer of homemade avocado oil mayo on top of salmon fillets, then sprinkle with breadcrumbs and bake until golden and crispy. The mayo crust adds a creamy and flavorful twist to the dish.

Deviled eggs: Mix the egg yolks with homemade avocado oil mayo, Dijon mustard, and a dash of paprika for a creamy and tangy filling. Spoon the mixture back into the egg whites for a crowd-pleasing appetizer.

Frequently asked questions about homemade mayo with avocado oil

  1. Can I use a different oil for homemade mayo? While avocado oil is highly recommended for its health benefits and flavor, you can experiment with other oils like olive oil or light-tasting oils. Keep in mind that the flavor and texture of the mayo may vary.
  2. Is homemade mayo safe to eat? Yes, homemade mayo is safe to eat as long as you follow proper food safety guidelines. Refrigerate it promptly, use clean utensils, and discard any mayo that shows signs of spoilage.
  3. Can I freeze homemade mayo? It is not recommended to freeze homemade mayo, as it can cause the emulsion to break and result in a watery texture when thawed.
  4. How long does homemade avocado oil mayo last? Homemade avocado oil mayo typically has a shelf life of about one week when stored properly in the refrigerator.
  5. Can I make vegan mayo with avocado oil? Yes, you can make vegan mayo by substituting the egg yolk with a plant-based alternative like aquafaba or silken tofu. Follow the same steps and enjoy a delicious vegan version of homemade mayo.

Conclusion: Enjoying the health and flavor benefits of homemade mayo with avocado oil

By making your own mayo with avocado oil, you can enjoy a healthier and tastier alternative to store-bought mayo. Avocado oil provides numerous health benefits, and homemade mayo allows you to control the ingredients, ensuring a clean and nutritious condiment. With the step-by-step guide, tips and tricks, and recipe ideas provided in this ultimate guide, you’ll be well-equipped to create your own delicious homemade mayo. So grab your whisk and start enjoying the health and flavor benefits of homemade mayo with avocado oil!

CTA: Now it’s time to put your newfound knowledge to use and start making your own homemade mayo with avocado oil. Get creative with flavors, try out different recipes, and enjoy the health benefits of this delicious condiment. Start your homemade mayo journey today!

Does oatmeal give you gas?

Does oatmeal give you gas?

Does Oatmeal Give You Gas?

Oatmeal is a staple in many health-conscious diets and is renowned for its beneficial properties. Packed with essential nutrients and fiber, oatmeal is often recommended as a breakfast food that can keep you satiated and provide a slow release of energy throughout the morning. However, despite its numerous health benefits, some people find that eating oatmeal can cause an uncomfortable side effect: gas. In this article, we will explore the reasons why oatmeal might give you gas and how to prevent this from happening so you can continue to enjoy this wholesome food.

Understanding Digestion and Gas

Before we delve into the specifics of oatmeal and gas, it’s important to have a basic understanding of digestion and what causes gas in the first place.

The Digestive Process

Gas is a natural by-product of the digestive process. As food breaks down in the intestine, gas is produced from the action of bacteria on the food matter. Everyone has gas and eliminates it by burping or passing it through the anus. However, certain foods can increase the amount of gas your body produces, which can lead to discomfort and bloating.

Complex Carbohydrates: Foods high in complex carbohydrates, like oatmeal, require more effort from your digestive system.

Fiber Intake: A high intake of dietary fiber can lead to increased production of gas.

Types of Fiber: There are two types of fiber: soluble and insoluble. Both can have different effects on gas production.

Why Gas Happens

Many factors contribute to the production of gas after eating, including how your body as an individual digests certain foods to the mix of bacteria in your digestive tract.

Enzymes and Bacteria: Not all carbohydrates are easily digested by enzymes in the small intestine. When undigested food reaches the colon, bacteria feed on it, producing hydrogen, carbon dioxide, and, for some people, methane. This leads to the sensation of gas.

Individual Sensitivity: Some people may be more sensitive to certain foods and experience gas as a symptom more intensely.

Quantities Consumed: The amount of food consumed can also influence gas production. Larger quantities of hard-to-digest carbohydrates will result in more gas.

Health Benefits of Oatmeal

Oatmeal has long been commended for its health benefits. It’s a highly nutritious food, offering protein, soluble fiber, and minerals.

Key Nutrients in Oatmeal

Beta-Glucan: Oatmeal contains beta-glucan, a type of soluble fiber that’s particularly effective at lowering cholesterol and making you feel full.

Antioxidants: Oats are also a fantastic source of antioxidants, which can protect against heart disease and certain cancers.

Understanding the positive aspects of eating oatmeal can help weigh the pros versus the cons if you find it gives you gas.

Oatmeal and Gas

Many people experience gas after eating oatmeal, and while this can be inconvenient, it’s a common reaction to the high fiber content in the oats.

The Role of Fiber

Oatmeal contains a substantial amount of soluble fiber. The soluble fiber in oatmeal is what leads to gas in several ways:

Bacterial Fermentation: Soluble fiber is fermented by bacteria in the large intestine, leading to gas.

Water Absorption: It absorbs water, which can increase stool bulk and gas as your body adjusts to increased fiber intake.

Gradual Adaptation: If you suddenly increase the amount of fiber in your diet, your body may produce more gas than usual.

Types of Oats

The type of oats may also play a role in how much gas they cause. Instant oats, steel-cut oats, and rolled oats differ in processing and may also vary in their propensity to cause gas.

Steel-Cut Oats: Less processed, may cause less gas because they’re consumed more slowly.

Rolled Oats: Partially cooked, making them easier to digest than steel-cut oats but possibly causing more gas than slower digesting varieties.

Instant Oats: Most processed, broken down the quickest in the digestive system, and may cause the most gas.

Individual Differences

Each person’s digestive system reacts differently to foods. Some people might be able to eat oatmeal without any issues, while others might find that it causes more gas. Possible reasons include:

Gut Flora: Different balances of gut bacteria may make some people more susceptible to gas from oats.

Digestive Enzymes: Having fewer enzymes to break down fiber could also lead to more gas when eating fiber-rich foods like oatmeal.

Managing Oatmeal-Induced Gas

If you love eating oatmeal but want to cut down on the gas it produces, there are steps you can take.

Tips to Reduce Gas

Gradual Fiber Increase: Increase your fiber intake slowly to allow your digestive system time to adjust.

Adequate Fluid Intake: Drink plenty of water when eating high-fiber foods to help fiber move through your digestive system more easily.

Detailed Journaling: Keep track of what you eat and any symptoms you experience to pinpoint whether it is indeed the oatmeal that’s causing gas.

Proper Cooking: Make sure to cook your oatmeal thoroughly. This can make it easier to digest.

Avoid Mix-ins: Sometimes the add-ins you put in your oatmeal, like milk or artificial sweeteners, may be the real culprits for causing gas.

Conclusion

While oatmeal can indeed be a cause of gas due to its high soluble fiber content, this should not necessarily discourage you from enjoying its health benefits. Modifying your intake, ensuring adequate hydration, and pacing your fiber increase can help manage and minimize the potentially gassy effects of oatmeal. Remember that each person is different, and what might cause gas in one person might not in another. Being aware of how your body responds to oatmeal and adjusting your consumption accordingly will enable you to maintain a nourishing diet without those uncomfortable side effects. Knowing your body and how it digests different foods are crucial to enjoying the vast nutrients that foods like oatmeal have to offer without discomfort.

Can chickens eat uncooked oatmeal?

Can chickens eat uncooked oatmeal?

Can Chickens Eat Uncooked Oatmeal?

Chickens are not just farm animals but also pets that require proper nutrition to stay healthy and happy. One common question many chicken enthusiasts ask is whether chickens can eat uncooked oatmeal or not. In this article, we guide you through the benefits and precautions of feeding your chickens uncooked oatmeal, helping you make informed decisions that contribute to their well-being.

Understanding Chicken Diet Basics

Before we dive into the specifics of feeding uncooked oatmeal to chickens, let’s take a quick look at what constitutes a balanced diet for our feathered friends.

The Essentials of Chicken Nutrition

Chickens, like all animals, require a balanced diet to thrive. The core components of a chicken’s diet should include:

  • Protein for growth and egg production
  • Carbohydrates for energy
  • Fats for energy and nutrient absorption
  • Vitamins and minerals for physiological functioning

Commercial feeds are formulated to meet all these dietary needs. However, many chicken keepers enjoy supplementing their chickens’ diet with kitchen scraps and other treats, which is where uncooked oatmeal may come in.

Can Chickens Eat Uncooked Oatmeal?

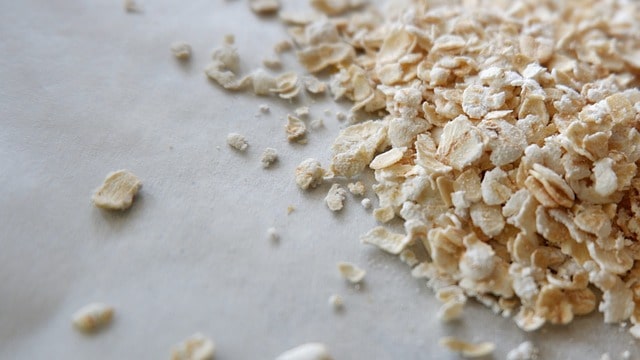
To answer the question in short: Yes, chickens can eat uncooked oatmeal. Oatmeal can be a nutritious addition to their diet, providing various health benefits. However, it should not replace a balanced poultry feed which is specifically designed for chickens.

Benefits of Uncooked Oatmeal for Chickens

Uncooked oatmeal is packed with nutrients that can be beneficial for chickens:

Whole Grains: Uncooked oatmeal is a whole grain that provides slow-releasing carbohydrates, allowing chickens to have energy throughout the day without causing spikes in blood sugar.

Proteins: Oatmeal contains proteins, which are essential for the growth, repair, and maintenance of body tissues, and particularly important for chicks and laying hens.

Fiber: The fiber in oatmeal helps with the chickens’ digestion, ensuring nutrients are absorbed and waste is excreted efficiently.

Vitamins and Minerals: It is also a good source of important vitamins and minerals like Vitamin B, iron, magnesium, and selenium, complementing their commercial feed.

How Much Uncooked Oatmeal to Feed

Even though uncooked oatmeal can be beneficial, it should be given in moderation:

  • Considered as a treat, oatmeal should not make up more than 10% of your chickens’ diet. Measure out no more than this recommended portion to avoid dietary imbalances.
  • Uncooked oatmeal treats can be given a few times a week as part of a varied diet.

Risks and Precautions

Despite the benefits, there are some risks and precautions to consider when feeding uncooked oatmeal to chickens.

Potential Risks

Weight Gain: Treats like oatmeal can lead to obesity in chickens if fed in large quantities, reducing their laying capability and increasing the risk of health issues.

Digestive Issues: Although oatmeal is fairly digestible for chickens, uncooked oat can expand in their digestive system, creating potential blockages if overfed.

Nutrient Imbalance: Because uncooked oatmeal can’t provide all the nutritional needs by itself, relying too heavily on this treat could lead to nutrient deficiencies.

Precautions When Feeding Uncooked Oatmeal

Portion Control: Always maintain strict portion control to avoid overindulgence.

Fresh Water: Provide plenty of fresh water as oatmeal can be absorptive and may lead to dehydration.

Variety: Mix oatmeal with other treats and feedstuffs to ensure a varied diet containing different nutrients.

Different Ways to Serve Uncooked Oatmeal to Chickens

Offering a variety in their diet keeps chickens excited about their feed and can stimulate their natural foraging behavior.

Uncooked oatmeal Serving Methods

Straight up: You can sprinkle uncooked oatmeal straight into their feed or scatter it on their bedding for them to peck at leisurely.

Mixed in: You may also choose to mix uncooked oatmeal with other foods they enjoy, such as vegetables or their regular feed, to create a diverse and appetizing meal.

Fermented Grains: Make a habit of fermenting oats with other grains. This can potentially unlock more nutrients and make them even easier to digest.

Final Thoughts

Feeding chickens uncooked oatmeal can be a beneficial addition to their diet when done sparingly and correctly. Remember that multiple factors need to be considered such as the bird’s age, their main diet, treats variety, and overall health.

As backyard poultry farming becomes more popular, understanding the nutritional needs of chickens is key to ensuring they lead healthy and productive lives.ür eventType`s are small, secretive birds that often frequent marshes and dense reed-beds, distinguished by their long bill and skulking behavior. They feed mostly on insects and aquatic invertebrates, picking food from the ground or water surface, and typically avoid open spaces to shield themselves from predators. Their plumage often matches the marsh vegetation, giving them excellent camouflage. They nest on the ground, mainly in Europe and Asia, migrating to warmer regions during the winter.

Is summer sausage good for you?

Is summer sausage good for you?

Is Summer Sausage Good for You?

When the summer months roll in, barbecues and picnics become more popular, and a variety of different foods take the stage to make these gatherings complete. One such food, which tends to be quite a hit on charcuterie boards and within sandwiches at picnics, is summer sausage. Named not for the season but rather for its durability without refrigeration, summer sausage is a type of cured sausage that is often enjoyed for its rich flavor and convenience. However, when it comes to health and well-being, the question arises: Is summer sausage good for you?

Understanding Summer Sausage

Before diving into the health implications of summer sausage, it’s vital to understand what this food actually is. Summer sausage is a term used for any sausage that can be kept without refrigeration until opened. This feature comes from how it’s made, which often involves a combination of curing, fermenting, and sometimes smoking. Some common ingredients found in summer sausage include:

Ground meats, such as beef, pork, or venison

Spices like garlic, black pepper, and mustard seeds

Preservatives, especially salt and sodium nitrite

The flavors of summer sausage can vary significantly depending on the specific recipe or brand, with some additional herbs and spices included to give unique twists.

Nutritional Content and Health Aspects

Now, to address the heart of the matter, we need to look at the nutritional content and how it matches up with health guidelines.

Calories and Macronutrients

An average slice of summer sausage can contain around 90-100 calories, depending on the size and specific ingredients used.

It tends to be high in fat, with a slice containing around 7-9 grams of fat, of which 2-3 grams may be saturated fat.

Protein is also a notable component, with a slice containing roughly 5-7 grams of protein.

Vitamins and Minerals

It may provide B-vitamins like niacin, vitamin B12, thiamin, and vitamin B6, which aid in energy metabolism and red blood cell formation.

It likely contains minerals such as zinc, phosphorus, and iron, albeit in small amounts, which are essential for different bodily functions.

Sodium and Preservatives

The most significant health concern is the high amount of sodium, commonly found as a key preservative. A single slice can contain anywhere from 300-500 mg of sodium, which can be a major consideration for those monitoring their salt intake.

Sodium nitrite, which is used to prevent the growth of bacteria and lend a pink color to the meat, has been under scrutiny for its potential health effects once transformed into nitrosamines in the body.

Health Considerations

Conversations around the health impact of consuming processed meats like summer sausage have been prevalent. It’s essential to factor in how summer sausage may be both good and potentially harmful for you.

Benefits

While not the pinnacle of health foods, summer sausage does have some advantages.

Protein: It’s a convenient source of quickly accessible protein, providing energy and supporting muscular health.

Vitamins and Minerals: The presence of B vitamins, particularly vitamin B12, promotes nerve health and helps in red blood cell formation. Iron is critical for oxygen transportation in the blood, and zinc aids in immune function and wound healing.

Risks

That said, summer sausage brings with it several considerations that may affect your well-being negatively.

Saturated Fat: A high-saturated-fat diet contributes to heart disease and high cholesterol levels. Long-term consumption of saturated fats in high quantities is particularly risky.

Sodium: The high sodium content of summer sausage can contribute to hypertension, cardiovascular diseases, and kidney issues. Salt-sensitive individuals should be especially wary.

Cancer Risk: Reports by entities like the World Health Organization have categorized processed meats as potentially carcinogenic, with regular consumption elevating the risk of colon cancer.

Weight Gain: Due to its high calorie density and fat content, unmoderated consumption of summer sausage can contribute to weight gain and associated health issues.

Balancing Diet and Delight

Should you then forego the pleasure of summer sausage for health’s sake? Not necessarily. Like with most foods, moderation is key.

Portion Control: Savoring summer sausage in small quantities can reduce the risks significantly.

Pairings: Combining it with healthier food choices like grains, fruits, and vegetables can offset some consumption downsides.

Frequency: Rather than daily indulgence, making it an occasional treat can diminish its impact on your overall diet.

Leaner Options: If available, opt for versions of summer sausage made with less fat for a healthier alternative.

Moreover, if you’re part of a dietary or health demographic that needs to watch intake of fats, sodium, or calories – such as people with heart conditions, high blood pressure, or those watching their weight – consulting with a nutritionist or a medical professional before regularly incorporating summer sausage into your diet would be wise.

Conclusion

While summer sausage is delicious and convenient, it’s essential to weigh the nutrition against personal health goals and dietary needs. It, alongside many processed meats, is generally high in saturated fats, sodium, and preservatives – components that might not align with heart-healthy diets.

Like with any indulgent food, moderation is key. If summer sausage is part of your culinary delights, consider it a treat rather than a daily dietary component and strive for balance with whole grains, fruits, vegetables, and other lean protein sources.

At the end of the day, summer sausage can be good for you if consumed intelligently. Making informed decisions, watching portion sizes, and attending to your body’s responses are all crucial for maintaining health while enjoying the flavorsome variety of foods life has to offer. So, by all means, nibble on that savory slice of summer sausage during your next gathering—just don’t make it the centerpiece of your diet.

Simmering milk l How to tell if milk is simmering?

The Gentle Art of Simmering Milk: A Comprehensive Guide

Milk is a versatile and essential ingredient in many recipes, from creamy sauces to delicate custards. However, getting it to the perfect temperature without scalding or boiling over can be a delicate process. Simmering milk is one technique that requires a bit of finesse and know-how. In this guide, we’ll explore how to tell if milk is simmering, common mistakes to avoid, and some tips that will have you simmering like a pro in no time.

The Basics of Simmering Milk

Simmering is a cooking technique used to gently heat liquids, which is particularly important for dairy since it can burn easily at high temperatures. When milk is simmered efficiently, it develops a rich flavor and texture that becomes the perfect base for various dishes.

Before we delve into the specifics, let’s define what simmering really means. Simmering involves heating the milk till it’s hot yet not too hot that it starts to boil. To achieve this, a sustained temperature at which small bubbles form around the edges of the pot — yet below boiling point — is necessary. Below are the basic steps to simmer milk properly:

Start with a heavy-bottomed pot: This will help in dispersing heat more evenly and reducing the risk of burning the milk.

Use medium to low heat: Lowering the heat once the milk starts to warm prevents it from boiling over.

Stir occasionally: This helps in preventing a skin from forming on the surface and sticking to the bottom.

What is Simmering?

Before diving into simmering milk especially, it is important to understand what simmering means in the culinary world.

  • Simmering refers to a method of cooking that uses a temperature just below the boiling point of liquid.
  • It is characterized by small bubbles that gently rise to the surface.
  • The temperature required to simmer is approximately between 180°F to 205°F (82°C to 96°C).
  • This cooking technique is often used for making stews, soups, and sauces to infuse flavors without the aggressive heat of boiling.

How to Simmer Milk

Simmering milk can be a common requirement for various recipes from sauces to desserts. It’s important to do this correctly to avoid scorching the milk or having it boil over. Below are step-by-step instructions to achieve a gentle simmer when heating milk.

  • Choose a suitable pot or saucepan with a heavy bottom. This will provide even heat distribution and prevent scorching.
  • Pour the milk into your chosen cookware. It is advisable not to fill the pot to the brim to avoid foaming over.
  • Heat the milk over medium heat. Heating too quickly on high heat can cause the bottom to burn before the rest warms through.
  • Stir the milk frequently with a spatula to prevent a film layer forming on top and to protect the bottom from scalding.
  • Keep a close eye on the milk as it heats. Look for small bubbles to start forming around the edges which indicates that the milk is approaching a simmer.
  • If you have a kitchen thermometer, use it to check the temperature. You’re aiming to stay within the simmering range.

How to Tell if Milk is Simmering

Telling if milk is simmering is crucial to ensure it doesn’t boil over or burn. Here’s what to look out for:

Visual Cues: Watch for tiny bubbles around the edges and a bit of steam. Unlike a full boil, it should not have rolling bubbles.

Temperature Test: Again, a kitchen thermometer is your friend. When milk reaches about 180°F to 185°F (82°C – 85°C), it is simmering.

Sound: Listen for a slight simmering noise as the heat works through the liquid. The sound should be soft, not the vigorous bubbling you hear during a full boil.

Smell: If you start to get a whiff of overly cooked milk or burning, the heat is too high, and it’s no longer simmering but possibly burning.

Why Simmer Milk?

Understanding the reasons for simmering milk can help with perfecting certain dishes and gaining deeper culinary knowledge.

Flavor Development: Simmering brings out the natural sweetness in milk and can be used for enhancing the flavor of beverages and dishes.

Texture: The simmering process can also change the texture of the milk, making it creamier and richer, which is perfect for sauces or hot drinks.

Temperature Elevation: Some recipes require a certain temperature for ingredients to dissolve or react, such as hot cocoa or custards.

Common Mistakes while Simmering Milk

Even experienced cooks can sometimes slip up when simmering milk. Here are common mistakes to avoid.

Ignoring the milk while it’s heating. This can lead to overcooking or burning.

Using high heat. Patience is key, and a lower heat setting is necessary for a consistent simmer.

Neglecting to stir. This results in hot spots and may cause parts of the milk to cook faster than others, leading to an unpleasant texture or taste.

Forgetting a temperature check. Without monitoring, it’s easy to pass the simmering point and move to a full rolling boil.

Understanding The Signs of a Simmer

Visual Cues

The first step to mastering the method is knowing what to look for. The visual cues for simmering milk include:

  • Small bubbles around the perimeter: You’re looking for a ring of tiny bubbles that begin to appear at the edge of the pan.
  • Steam: As milk heats up, steam begins to rise from the surface. However, if you notice a lot of steam, the heat might be too high.
  • Surface movement: There should be gentle movement in the milk, but not rolling waves.

Temperature Measurement

Simmering often occurs between 180°F and 200°F (82°C and 93°C). It’s smart to use a thermometer the first few times you try simmering so you become familiar with how it should look and feel.

Sensory Indicator

Touch: Using caution, feel the side of the pot. It should be getting hot but shouldn’t be so hot that you can’t keep your hand there comfortably for a few seconds.

Sound: Simmering milk has a soft, whispering sound — more than warm milk but far quieter than a roiling boil.

Tips and Tricks for Perfectly Simmered Milk

To streamline the process and ensure perfectly simmered milk, consider these tips:

  • Use heavy-bottomed and high-sided pots to prevent boiling over and encourage even heating.
  • Rinse the pot with cold water before adding milk to avoid sticking and scorching.
  • For extra protection against bottPERATURE monitoring ct a wooden spoon across the top of the pot; if milk boils, it will rise and hit the spoon instead of spilling over.

Recipes Involving Simmered Milk

There are myriad recipes that hinge on the practice of simmering milk. Here are a few classic examples where simmered milk is key:

Hot Chocolate

Rich, creamy hot chocolate requires milk to be heated gently, plus simmering infuses flavor from the cocoa and any spices used.

Bechamel Sauce

A foundational recipe in many culinary traditions, bechamel or white sauce, is best when the milk is heated to a simmer before gradually adding to a roux.

Indian Desserts

Many desserts in Indian cuisine, like Rabri or Kheer, require milk to be simmered for a long period, which concentrates the flavor and thickens the consistency.

Homemade Yogurt

The art of yogurt-making starts with simmering milk. Heating it just right helps ensure a proper incubation environment for the cultures.

Alleviating Simmer Troubles

Here are a few tips to give you better control during the simmering process:

  • Cut a collar out of non-stick baking paper placed over the surface of the milk; this prevents a skin from forming.
  • Wash the pan thoroughly to ensure no residue is left to burn.
  • Add a small amount of sugar which can help prevent protein from sticking to the pot.

FAQs for Smooth and Safe Simmering

Lastly, let’s anticipate some concerns that could arise during this process:

  • **Can you simmer milk too long?** Yes, simmering milk for too long can lead to a thickened consistency and eventually burning.
  • **Is simmering milk safe?** It is safe as long as you pay constant attention to it. Unattended hot milk will overflow or burn.
  • **Can all types of milk be simmered?** Indeed, but the fat content affects the outcome. Full-fat milk yields a creamier taste and mouthfeel.
  • **What to do if my milk just won’t simmer?** Ensure your stove is functional, increase the heat incrementally but if it still doesn’t simmer, check for low power issues.

Final Thoughts

Simmering is a seemingly simple cooking technique that significantly affects the outcome of recipes using milk. By mastering the nuances of what it takes to simmer milk without scalding or boiling over, home cooks can unlock new depths of flavor and polish their culinary executions.

Tips and precautions taken while simmering milk can make the difference between an okay dish and a spectacular one. Remember that the keys to success are patience, attention, and knowledge about what you’re aiming for.

With these guidelines and a bit of practice, anyone from an amateur home chef to a seasoned professional can achieve flawless simmered milk, a building block to an array of delightful recipes